Are you a newbie when it comes to a bread machine? There’s nothing to fret about because your all-things-bread experts are here!
Before we begin – take a look at our favorite bread machine!
No products found.
The Basics
One of the first things any person with common sense would do is, turn to the user manual provided with your favorite bread maker. Grab that and get digging. Get to know the basics first like how the lid opens, explore the control panel and the buttons, look at the utensils provided with it, how the machine works, and various functions of the bread machine.
Get to know all these before you even turn on the bread machine. We advise you not to get experimental before you have a basic idea of the machine. Get comfortable with the device first before you go on pushing its buttons.
You can’t really learn while the bread maker is operating because it’s hot. So see if you have all the parts mentioned, and you understand what each of them does before you switch it on.
Bread Bucket’s Capacity
The perfect recipe for disaster is trying to make a 2 lb bread in a 1 lb bread maker. We have observed this a lot that most of the bread makers don’t clearly specify what their bread capacity is. If the machine doesn’t state that, you can use another.
So to avoid that from happening, grab a measuring pan and fill the bucket with plain water. When it’s full, check how many cups did you use to fill it up. But make sure you measure it correctly each time.
The Settings
Get back to the user manual and open the settings page. We’ll now observe the control panel. Most of them come with standard controls such as start/stop, arrow buttons crust settings, and timer. There’s not much to this as most of them are pretty easy to comprehend; however, some machines have added features, so in case you don’t understand, refer to the user manual.
Let’s Get Baking!
We’ll be using ingredients used for making plain bread, which are:
- Dry yeast
- Flour
- Salt
- Sugar
- Water (room temperature)
- Fats
A valuable tip is that it doesn’t matter what order you opt for, but what matters is that you use the delay cycle if you’re going to put all the ingredients in a bread machine.
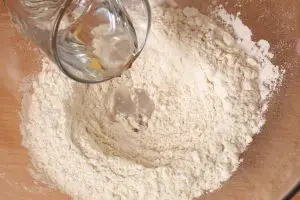
- Pour in liquids.
- Add flour in a way that it’s over the water and seals it.
- Add dry ingredients such as milk, sugar, salt, and others.
- Make a small ditch in the center and add the yeast, so it doesn’t touch the liquid.
Now place the bread pan in the machine and choose the cycle you want. Calculate the total time required and set the timer.
When you’re ready, press start and relax.
That’s it.
Easy, isn’t it? It’s THAT simple, but we understand how people can get overwhelmed at first. Make sure not to fret if your bread doesn’t turn out as you expected it. Practice makes a man perfect and with some tried, you will get the hang of it as well!