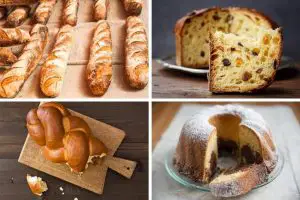
Denmark is known for its delicious pastries. For this reason, it is no surprise that bakers all over the world want to learn how to make these delicious recipes.
Danish dough is incredibly buttery and flaky, resulting in sinfully delicious pastries that most of us would never be able to resist. Throw in some fresh fruit, icing, and chocolate chips, and you have yourself a world-class pastry that even the pickiest of eaters would adore.
In this article, we will be guiding you through one of the best Danish dough pastry recipes out there. More so, we will mention a few tips to keep in mind in order to get the best end result.
With a tantalizing crispy crust and sweet filling, your family will simply never get enough. This dish is best served hot and with a cup of tea or coffee. So without further ado, let’s get right into learning how to make Danish dough pastries so you can get baking and eating!
Ingredients That You Will Need
For starters, you will need to ensure that you have all the necessary ingredients on hand. You are likely to have most of these ingredients in your pantry already, making this recipe that much easier to follow.
- 2 cups of unsalted butter (softened)
- ⅔ cup of all-purpose flour
- 2 ½ cups of fresh, full cream milk
- ½ cup of white sugar
- 2 teaspoons of salt
- 4 ½ teaspoons of active dry yeast
- 8 cups of all-purpose flour
- 2 large eggs
- 1 teaspoon of lemon juice or extract
- 1 teaspoon of almond extract
Directions
After stocking your pantry, you will be able to begin making your delicious Danish dough patries. In order to achieve the best results, make sure that you follow the steps below exactly:
Step One
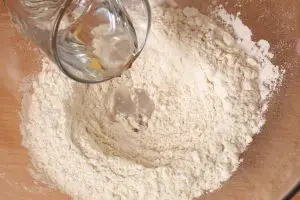
Start by creaming together the softened butter and ⅔ cup of all-purpose flour. Make sure that you get rid of any lumps that may have formed, as this will create air bubbles in your dough.
Once satisfied with the mixture, divide the dough into 2 separate halves and roll each in between sheets of wax paper. Keep these sheets refrigerated.
Step Two
In a large bowl, mix together the active dry yeast and the remaining 3 cups of all-purpose flour. Over medium heat and in a small saucepan, combine the full cream milk, salt, and sugar. Heat this mixture until it is warm (not hot to the touch). Add the warm milk mixture to the yeast and flour.
You can also throw in the eggs and almond and lemon extracts. Stir this mixture for at least 3 minutes before kneading in the final ½ cup of flour. Once the dough is firm and pliable, allow it to rest until it has doubled in size.
Step Three
Cut the dough in half and roll the pieces into 14-inch squares. Take out your two sheets of butter dough and place each sheet over one of the squares. Make sure that you seal the edges by pressing them down with your fingers.
Roll each piece into a 20 x 12-inch rectangle. You can then fold it into thirds by folding the long sides towards the center. Once finished, wrap your dough in plastic and store it in the fridge for at least half an hour.
Step Four
Remove the dough from the refrigerator one at a time. You can now roll and fold each piece a few more times. Place the folded dough back into the fridge for another 30 minutes.
Step Five
In order to fold the pastries, you will need to roll the dough out to a ¼ inch thickness. Cut the dough into squares and place the filling of your choice into the center.
Then, fold the corners of the square towards the center, creating a diamond-like shape. Place the pastries onto a greased baking dish and let them rise until doubled in size.
You can then brush the surface with butter in order to add that crispy texture. Bake the pastries for about 8 to 10 minutes at 450 degrees Fahrenheit.
Tips for Baking the Perfect Danish Dough Pastries
Now that you know the ingredients and steps in the process, we would like to share a few tricks of the trade that will ensure you make the best Danish dough pastries every single time.
Make Sure Your Dough Is Cold
Your dough will be incredibly hard to work with if it is not cold. To be more specific, warm dough will stick to your hands and the table surface, making it almost impossible to shape.
For this reason, make sure that you never skip the steps that involve storing the dough in the refrigerator. More so, allow the dough to cool down for a good period of time (at least 30 minutes).
Do Not Use Dough That Is Too Thick
A common mistake that beginners make is mixing the dough to be too thick. The thicker you roll the dough, the more dense your pastry will be. This will result in thick, dense, and stodgy pastry that lacks the lightness and finesse of well-made Danish dough pastries.
For this reason, it is vital that you roll it thinly enough. Most recipes, including ours, suggest that you roll the dough until it is about a ¼ inch thick.
Allow Your Dough To Rise
The longer you leave your dough to rise, the better your pastries will be. This creates the soft and buttery texture that everybody loves about pastries. For this reason, you will need to leave your dough to rise for about 30 to 45 minutes before shaping your danishes.
Final Thoughts
Danish pastries are extremely popular all over the world. When made correctly, they will be a favorite in your household. In order to make the best Danish dough pastries, ensure you have all the necessary ingredients on hand and follow the instructions as indicated above.
You can decide which filling and toppings you would prefer. Some of the most popular Danishes include chocolate chips, fresh fruit (such as blueberries and strawberries), and icing. You can also add lemon curd or cream cheese.