When you bake bread, one of the most important steps is proofing. During this process, the yeast in the dough is activated. It consumes carbohydrates and expels gasses of carbon dioxide, which cause the dough to expand and rise. Proofing covers this entire process, which is also called fermentation. However, it is often used to describe the final rise of the dough just before you bake it.
Why Proofing Is Important?
Proofing is important because it is the process that allows the yeast to do its part in the bread baking process. When the yeast releases the carbon dioxide, it creates air pockets that are a part of different types of bread. However, you need to make sure that you don’t allow the dough to be over-proofed or under-proofed.
Over-proofing will cause the bread to rise a lot and then collapse, which makes the layers separate. If it is under-proofed, it will not give you fluffy layers. It won’t rise when you bake it, and your bread won’t turn out the way you want it to.
How Humidity Affects Proofing?
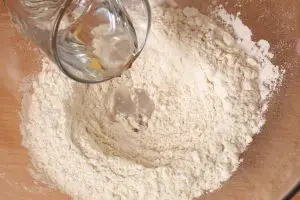
The relative humidity has an impact on proofing. High humidity causes the flour to absorb moisture from the air, which increases hydration. When people bake in a humid environment, they may need to lower the hydration when they are baking. By the same token, low humidity will dry out the bread and people will add more water to the dough.
To understand bread proofing humidity, you need to know the basic percentages. For example, if the dough has 1,000 g of flour and 600 g of water, it has a hydration of 60%. There is a mathematical formula called the Baker’s Percentage, which is the weight of the ingredient divided by the weight of the flour, and then you multiply the result by 100.
The humidity or hydration will determine several factors with your bread, including the following:
- The elasticity of the dough
- The stickiness of the dough
- How much it rises
- How crispy or soft the crust is
- How quickly the dough will rise
- How much the dough will rise
The Ideal Humidity for Proofing Bread
When humidity is higher, the yeast becomes more active during the proofing process. This can lead to over-proofing, and it can also cause the bread to smell bad, taste bad, and have a texture that isn’t what you want. You may need to reduce the water in your recipe if the environment has high humidity.
The ideal relative humidity for proofing bread is between 80% and 85%. At 80% humidity, the yeast can be active and ferment, and it will expand with the right amount of moisture. However, if it is more humid, you may want to adjust your recipe and reduce the water. If it is very dry, make sure you keep the humidity in the bread at 80% by adding water as you need it.
How to Control Humidity While Proofing Bread?
There are four ways to proof bread dough for its final rise before you bake it. The first is to let it sit at room temperature. You can leave it in a glass bowl or use a proofing basket. If you have a warm kitchen with some humidity, this is a good option. You can cover the bowl with a damp cloth and then place cling wrap over it.
Another method is to let it proof in the oven. Fill a glass baking dish with boiling water on the bottom rack of the oven. Place your dough on the top rack, shut the door, and let it proof. This is a great way to add humidity so that your dough can rise.
You can also use a slow cooker. Fill it about halfway with water, and put it on a low setting. Then, place the lid upside down on it and cover it with a dish towel. Place your glass bowl of dough on top of the lid.
Finally, you can use a proofing box. This is the most accurate method because it is designed to keep the temperature and humidity consistent while the bread proofs.
Final Words
When you bake bread, the proofing process is an important part of determining how your bread will turn out. You need the humidity to be around 80%, so use one of the methods above to control the humidity while you proof your bread.


